
Exploring Azure Custom Actions Part 3
In part 2 of this series, we created some C# code to restart web applications based on resource ID’s located in the application settings. In this part, we will deploy this code to a storage account (so that we can have our function auto start with appropriate code) and update our ARM template to deploy our web application.
As per the documentation configuring an Azure App Service to run code from a URL is pretty easy. We effectively just have to set an appropriate URL in the WEBSITE_RUN_FROM_PACKAGE application setting. Further, if using Azure blob storage, we can set a URL with a SAS token or we can use managed identity.
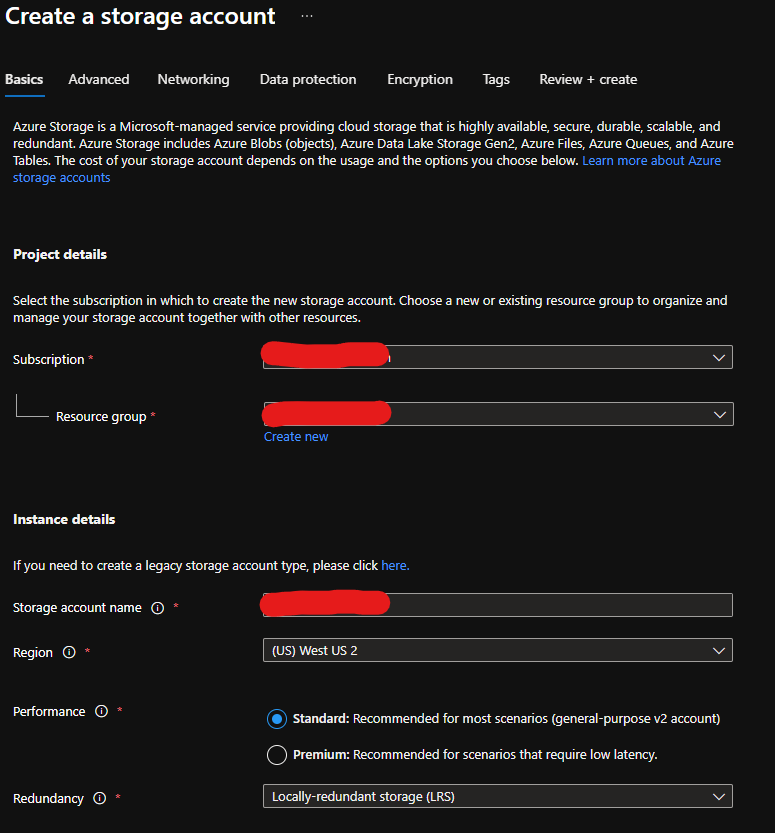
For the purposes of this blog post, we will use SAS tokens. Step 1 is to create an Azure Storage Account to store our zip file. Let’s use the portal to create this. After creating a new resource group, we can click the add button and search for Storage Account. I don’t need anything fancy, so selecting locally-redundant storage (LRS) is the best option for me.
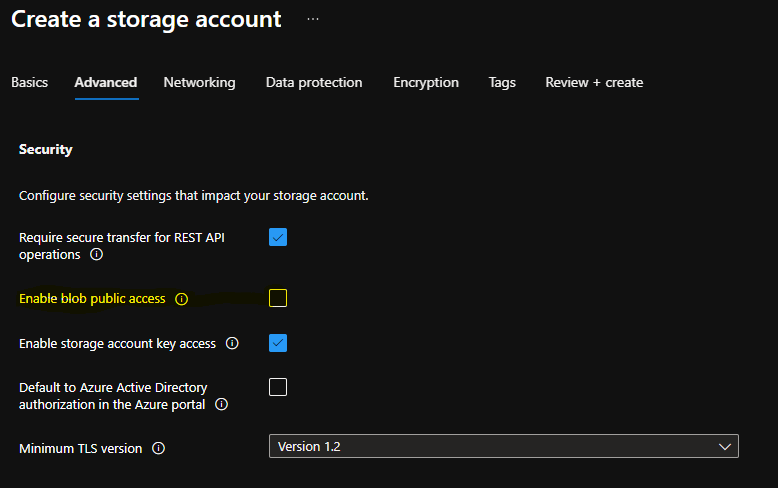
Under the security section, we will want to ensure that blob public access is disabled (since we are going to use SAS tokens).
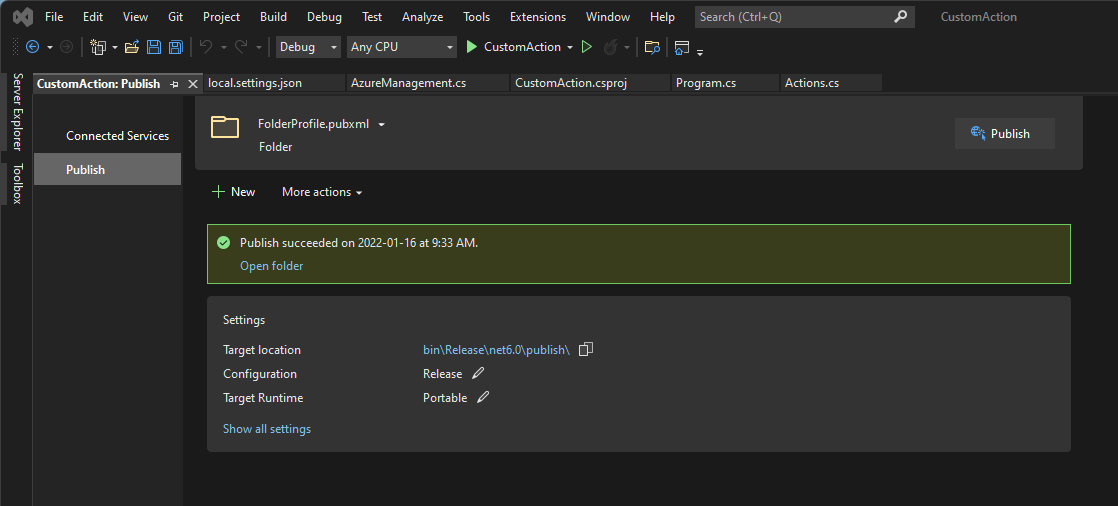
The rest of the defaults can likely be kept. While the storage account is being created, we can pop back into Visual Studio to create a publish of our code that we can zip up. Using the publish wizard, select the folder publish option and hit the publish button.
From a zip perspective, we can use windows terminal to run the following command in the directory the publish outputted to. After navigating to the output folder path, run:
Compress-Archive -path *.* -destinationPath app.zip
It is important to note here that typically if you run compress-archive on a folder, the zip itself will include that folder name as the root element. We don’t want this as the Azure App Service will not know how to find our code if that happens.
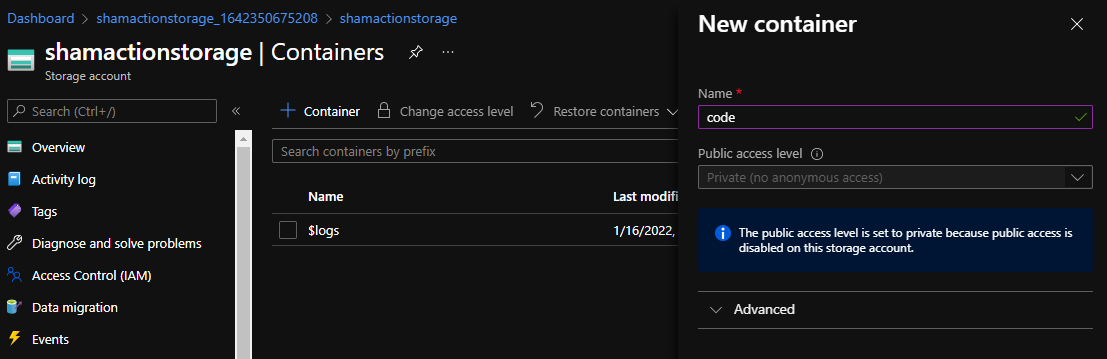
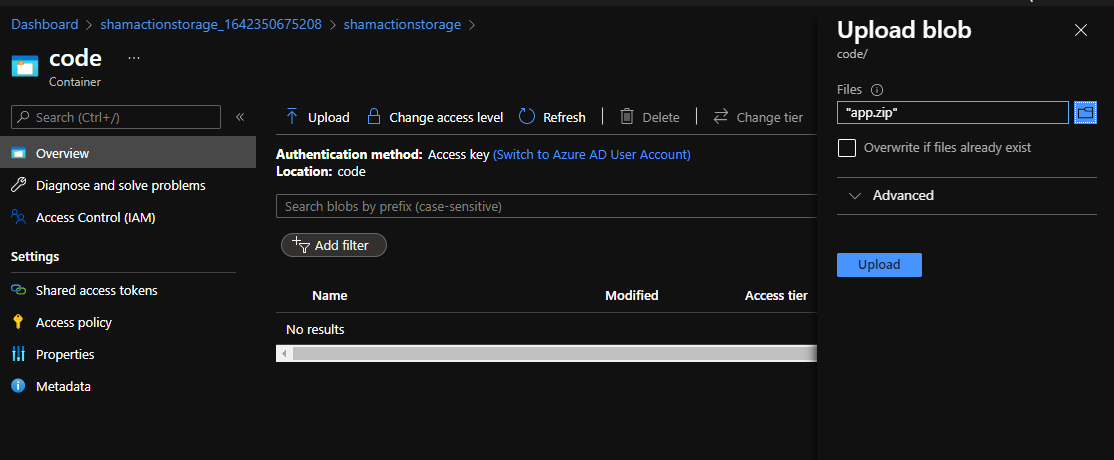
Once we have our zip, we can use the portal tooling to upload it. First we need to create a container to host our code. Because we are feeling creative, let’s call it code.
And then upload our file.
Lastly, we will need to generate a SAS token for this file. You can click on the file after uploading and head to Generate SAS to get started. Here is an example of what I did.
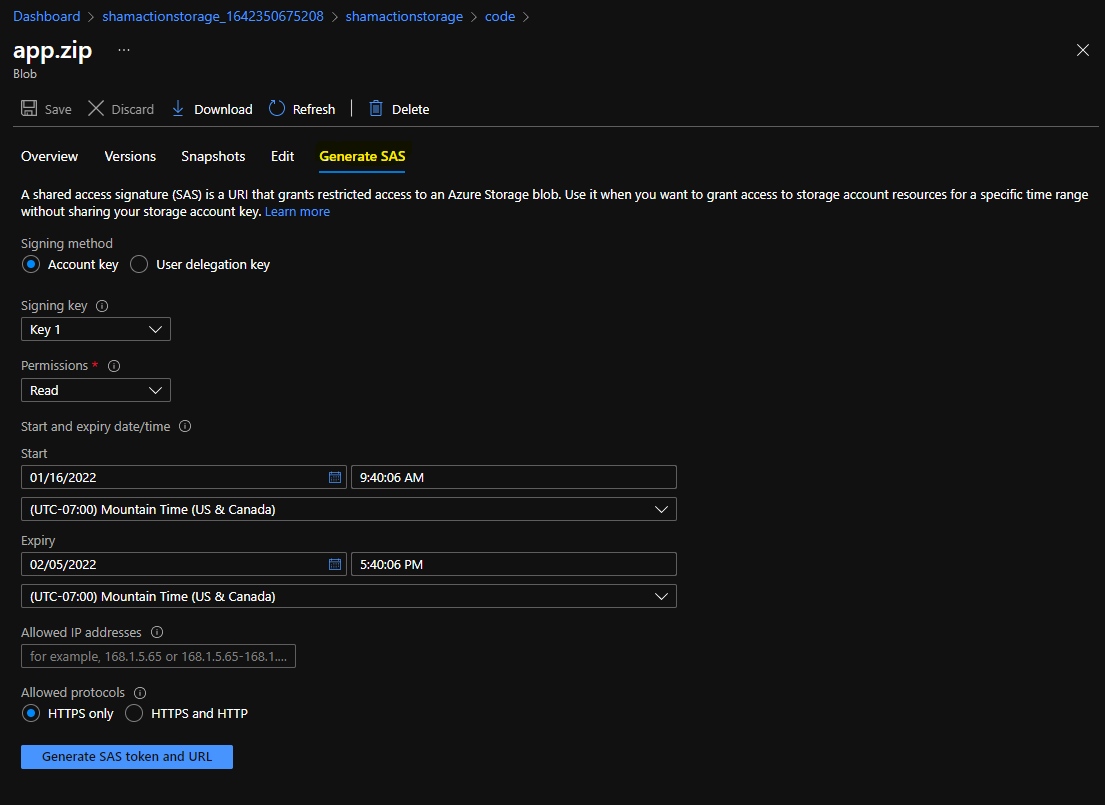
Clicking on Generate SAS token will give us what we need for our ARM template. Now we can have a look at modifying our original ARM template to include new infrastructure components to support this action. We will need:
- The Azure function itself, along with managed identity
- A role assignment for that managed identity
- Application_settings with the correct resource IDs for the web apps to restart
- The proxy definition
The first thing we are going to do is add the required components for the Azure Function App. This is the storage account and the dynamic app service plan. For reference:
Azure Server Farm ARM Reference
The code looks something similar to:
{
    "type": "Microsoft.Storage/storageAccounts",
    "apiVersion": "2021-06-01",
    "name":"[variables('faspStorageName')]",
    "location":"[variables('location')]",
    "kind": "StorageV2",
    "sku":{
        "name": "Standard_LRS"
    },
    "properties": {
        "allowBlobPublicAccess": false,
        "minimumTlsVersion": "TLS1_2",
        "supportsHttpsTrafficOnly": true
    }
},
{
    "type":"Microsoft.Web/serverfarms",
    "apiVersion":"2016-09-01",
    "name":"[variables('faspName')]",
    "location":"[resourceGroup().location]",
    "properties":{
        "name":"[variables('faspName')]",
        "computeMode":"Dynamic"
    },
    "sku":{
        "name":"Y1",
        "tier":"Dynamic",
        "size":"Y1",
        "family":"Y",
        "capacity":0
    }
},
The next part is the Azure Function app itself. They key parts here are ensuring that there is a system assigned identity and that the code is pulled from the correct download URL location.
{
    "type": "Microsoft.Web/sites",
    "apiVersion": "2021-02-01",
    "name":"[variables('managementName')]",
    "location":"[variables('location')]",
    "kind":"functionapp",
    "dependsOn":[
        "[variables('faspName')]",
        "[variables('faspStorageName')]"
    ],
    "identity": {
        "type": "SystemAssigned"
    },
    "properties":{
        "serverFarmId":"[resourceId('Microsoft.Web/serverfarms',variables('faspName'))]",
        "siteConfig":{
            "appSettings":[
                {
                    "name":"AzureWebJobsStorage",
                    "value":"[concat('DefaultEndpointsProtocol=https;AccountName=', variables('faspStorageName'), ';AccountKey=', listKeys(resourceId('Microsoft.Storage/storageAccounts',variables('faspStorageName')),'2019-06-01').keys[0].value)]"
                },
                {
                    "name": "WEBSITE_CONTENTAZUREFILECONNECTIONSTRING",
                    "value": "[concat('DefaultEndpointsProtocol=https;AccountName=', variables('faspStorageName'), ';AccountKey=', listKeys(resourceId('Microsoft.Storage/storageAccounts',variables('faspStorageName')),'2019-06-01').keys[0].value)]"
                },
                {
                    "name": "FUNCTIONS_EXTENSION_VERSION",
                    "value": "~4"
                },
                {
                    "name": "WEBSITE_NODE_DEFAULT_VERSION",
                    "value": "~14"
                },
                {
                    "name": "FUNCTIONS_WORKER_RUNTIME",
                    "value": "dotnet-isolated"
                },
                {
                    "name":"WEBSITE_RUN_FROM_PACKAGE",
                    "value":"[parameters('downloadUrl')]"
                },
                {
                    "name":"WEBAPP1_ID",
                    "value":"[resourceId('Microsoft.Web/sites',variables('web1Name'))]"
                },
                {
                    "name":"WEBAPP2_ID",
                    "value":"[resourceId('Microsoft.Web/sites',variables('web2Name'))]"
                }
            ]
        }
    }
},
After we have the azure function, we need to give the managed identity access to make application changes. Keeping things easy, I will grant the management function contributor access to the resource group itself. You could likely use Azure Built-in Role Website Contributor instead.
Azure Role Assignment ARM Reference
Azure Role Assignment ARM Template How To
{
    "type": "Microsoft.Authorization/roleAssignments",
    "apiVersion":"2021-04-01-preview",
    "name":"[variables('contributorRoleName')]",
    "dependsOn":[
        "[variables('faspName')]"
    ],
    "properties": {
        "roleDefinitionId":"[variables('contributorRoleDefinitionId')]",
        "principalId":"[reference(resourceId('Microsoft.Web/sites',variables('managementName')),'2021-01-15','Full').Identity.principalId]",
        "principalType":"ServicePrincipal"
    }
},
And lastly, we need the code for the resource provider itself.
Azure Custom Providers ARM template reference
{
    "type": "Microsoft.CustomProviders/resourceProviders",
    "apiVersion": "2018-09-01-preview",
    "name":"public",
    "location":"[variables('location')]",
    "dependsOn":[
        "[variables('faspName')]"
    ],
    "properties": {
        "actions":[
            {
                "name":"Restart",
                "routingType": "Proxy",
                "endpoint":"[concat('https://',variables('managementName'),'.azurewebsites.net/api/restart?code=',listkeys(concat(resourceId('Microsoft.web/sites',variables('managementName')), '/host/default/'),'2016-08-01').functionKeys.default)]"
            }
        ]
    }
}
You can see the whole template here
After deployment, you should see the following resources. If you select “Show Hidden Types”, you’ll see our custom resource provider deployment as well.

In the last part, we will test out our custom action and wrap things up. Hope you enjoyed part 3.
About Shamir Charania

Shamir Charania, a seasoned cloud expert, possesses in-depth expertise in Amazon Web Services (AWS) and Microsoft Azure, complemented by his six-year tenure as a Microsoft MVP in Azure. At Keep Secure, Shamir provides strategic cloud guidance, with senior architecture-level decision-making to having the technical chops to back it all up. With a strong emphasis on cybersecurity, he develops robust global cloud strategies prioritizing data protection and resilience. Leveraging complexity theory, Shamir delivers innovative and elegant solutions to address complex requirements while driving business growth, positioning himself as a driving force in cloud transformation for organizations in the digital age.